So, you have a waterworks project with a long run of buried Ductile iron pipe where joint restraint is required. What is a reliable, affordable, and easy-to-install solution? The Sure Stop 350® Gasket (SSG) is a good choice. Not familiar with it? This #IronStrong Blog will describe a Sure Stop Gasket, what it is intended for, and how to install it properly.
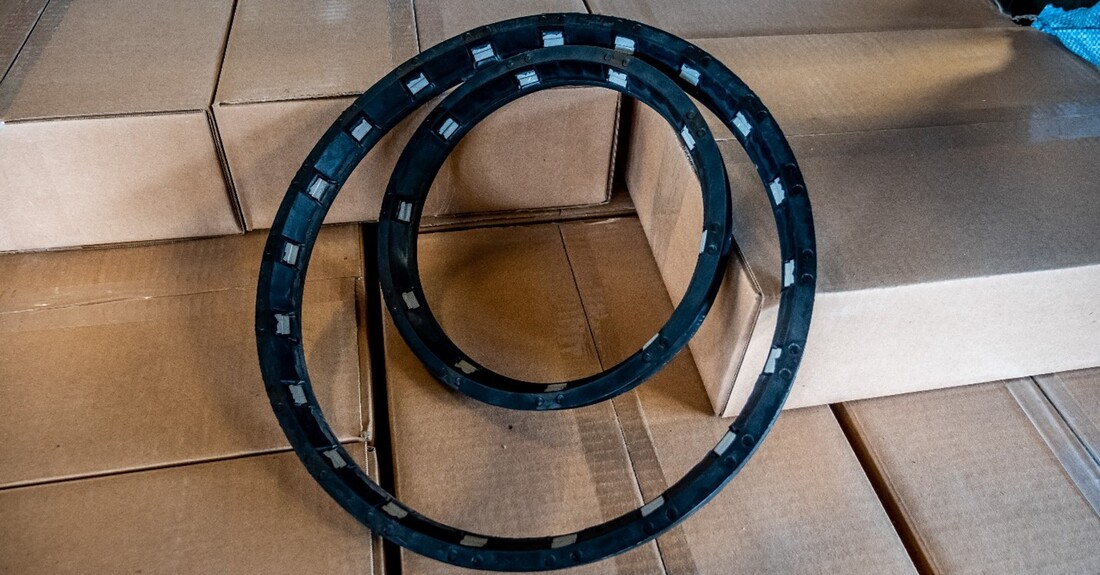
WHAT IS A SURE STOP 350® GASKET, AND WHY USE IT?
Sure Stop 350 Gaskets for Tyton Joint® from McWane Ductile are available from 3-inch through 24-inch to provide instant and easy joint restraint for Tyton Joint pipe. SSGs are rated for 350 psi working pressure with a 2:1 safety factor and allow up to a 5-degree deflection at each joint.
Sure Stop 350 Gaskets are boltless, allowing quick, simple installation without special wrenches or tools, and are Underwriters Lab (UL) listed and Factory Mutual (FM) approved. SSGs can be furnished with various gasket compounds, including the standard SBR, Neoprene, EPDM, and Nitrile. ** FM Rating: 3–16 in. = 250 psi | 18–24 in. = 200 psi
Bell Details
| Pipe Size Nominal Inches | Circumference |
Diameter |
||
| Min. | Max. | Min. | Max. | |
| 3 | 12-1/4" | 12-5/8" | 3.90" | 4.02" |
| 4 | 14-29/32" | 15-9/32" | 4.74" | 4.86" |
| 6 | 21-1/2" | 21-7/8" | 6.84" | 6.96" |
| 8 | 28-1/4" | 28-5/8" | 8.99" | 9.11" |
| 10 | 34-11/16" | 35-1/16" | 11.04 | 11.16" |
| 12 | 41-9/32" | 41-21/32" | 13.14 | 13.26" |
| 14 | 47-13/16" | 48-7/32" | 15.22" | 15.35" |
| 16 | 54-13/32" | 54-13/16" | 17.32" | 17.45" |
| 18 | 61" | 61-13/32" | 19.42" | 19.55" |
| 20 | 67-19/32" | 68" | 21.52" | 21.65" |
| 24 | 80-13/16" | 81-7/32" | 25.72" | 25.85" |
HOW DO I INSTALL THE SURE STOP 350® GASKET?
DO IT RIGHT – WATERTIGHT! Because Sure Stop 350 Gaskets are much simpler to install than other joint restraint mechanisms, it may be common for crews to overlook a few crucial procedures. To ensure proper joint assembly, follow these seven basic steps and always check your work.
GATHER TOOLS NEEDED:
- Recommended PPE: Safety Glasses and Gloves
- The McWane Ductile Sure Stop Gasket Installation Tip Sheet available in English and Spanish (click the download button below)
- Sure Stop Gaskets
- Wire Brush
- Screwdriver or Chisel
- Clean, Damp Rag
- Lubricant supplied by the Manufacturer
- Paint Brush
- Feeler Gauge
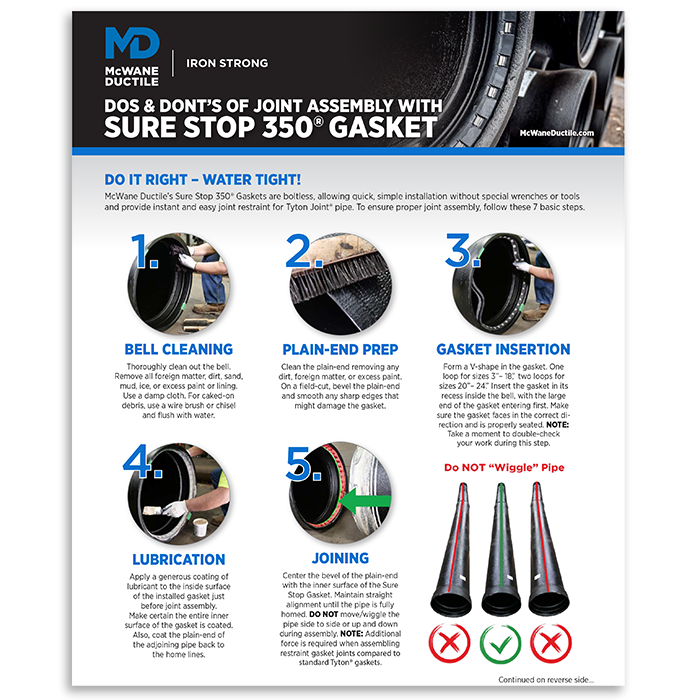
Do it right – watertight, when installing Sure Stop 350™ Gaskets. Use our free and handy tip sheet to ensure proper joint assembly.
STEP 1: BELL CLEANING
Thoroughly clean out the bell. Remove all foreign matter, dirt, sand, mud, ice, or excess paint or lining. Use a damp cloth. For caked-on debris, use a wire brush or chisel and flush it with water.
STEP 2: PLAIN-END PREP
Clean the plain-end removing any dirt, foreign matter, or excess paint. On a field-cut, bevel the plain-end and smooth any sharp edges that might damage the gasket.
STEP 3: GASKET INSERTION
Form a V-shape in the gasket. One loop for sizes 3-inch through 18-inch, two loops for sizes 20-inch through 24-inch. Insert the gasket in its recess inside the bell, with the large end of the gasket entering first. Make sure the gasket faces in the correct direction and is properly seated.
PRO TIP: Take a moment to double-check your work during this step.
STEP 4: LUBRICATION
Apply a generous coating of lubricant supplied by the manufacturer to the inside surface of the installed gasket just before joint assembly. Make sure the entire inner surface of the gasket is coated. Also, coat the plain-end of the adjoining pipe back to the home lines.
STEP 5: JOINING
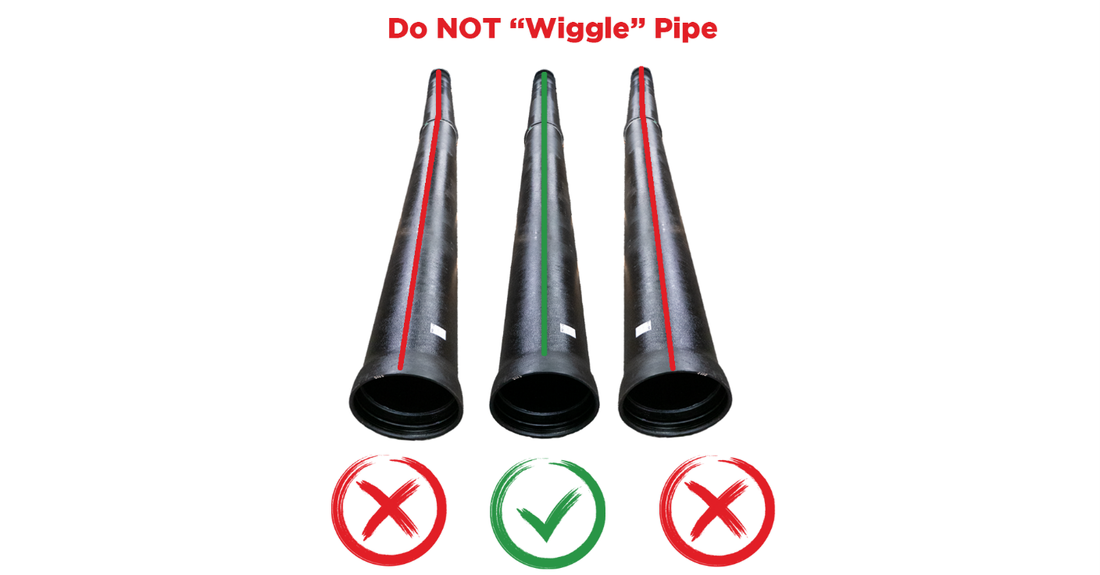
Center the bevel of the plain-end with the inner surface of the Sure Stop Gasket. Maintain straight alignment until the pipe is fully homed. DO NOT move or wiggle the pipe side to side or up and down during assembly.
PRO TIP: Additional force is required when assembling restraint gasket joints compared to standard Tyton® gaskets.
STEP 6: DEFLECTION
Deflection may be obtained after the joint is assembled per the chart below.
| Size Inches | Rating PSI | Deflection Degrees |
| 3 | 350 | 5 |
| 4 | 350 | 5 |
| 6 | 350 | 5 |
| 8 | 350 | 5 |
| 10 | 350 | 5 |
| 12 | 350 | 5 |
| 14 | 350 | 5 |
| 16 | 350 | 4 |
| 18 | 350 | 4 |
| 20 | 350 | 2.5 |
| 24 | 350 | 2.5 |
STEP 7: VERIFY ASSEMBLY
Use a feeler gauge to verify a correctly assembled joint. If you do not have a feeler gauge, contact your local McWane Ductile Sales Representative. For an additional visual quality check, shine a flashlight down the barrel of the pipe to inspect for any sagging or exposed gaskets.
ADDITIONAL APPLICATION NOTES
- For Ductile iron applications utilizing Tyton pipe, valves and fittings are manufactured to AWWA specifications.
- In cold weather assembly, maintain the temperature of the gasket above 40° F.
- The joint socket should be clean and free of debris or significant corrosion.
- The gasket should be seated correctly in the bell socket.
- Keep the pipe and joint in alignment during assembly. If installed out of alignment, the gasket can be pushed out of position, creating the potential for leaks or failure.
- If deflection in the joint is desired, deflect before fully inserting the joint.
- Some extension of the joint will occur when pressurized. To avoid extension of the joint, the joint should be pulled out after assembly to "set" the stainless-steel teeth in the inserted pipe.
- Once assembled, the joint can be disassembled using steel shims
- When a cut pipe is used, the following steps are required:
- Ensure that the spigot end is properly beveled.
- Mark the joint depth on the spigot, so it is evident when the joint is fully inserted.
- Ensure that the pipe meets the required dimensional tolerances.
THE DO NOTS WHEN INSTALLING SURE STOP GASKETS®
- DO NOT reuse Sure Stop 350 Gaskets, as they may have been damaged during any previous installation or removal.
- DO NOT use SSGs to conduct electricity through the pipe joint, as they could be damaged and fail.
- DO NOT use SSGs in above-ground applications.
- DO NOT use SSGs with a thick coating on the pipe exterior.
- DO NOT just push the pipe through a straight casing. The most reliable method is a concurrent PUSH and PULL. PUSH to drive the pipe, PULL to keep the pipe straight to avoid detrimental snaking of the pipeline.
COMPATIBILITY NOTE: McWane Ductile’s Sure Stop 350 Gasket is designed for use in Tyton Joint Ductile iron pipe products manufactured by McWane Ductile to conform to the latest licensed Tyton Joint drawings and parameters. SSGs may also be used in any other Tyton Joint provided it conforms to the latest licensed Tyton Joint drawings and parameters. SSGs are not warrantied for use in other products or non-licensed push-on joints. Additionally, gaskets not provided by McWane Ductile, whether restrained or non-restrained, are not warrantied for use in McWane Ductile products.
**McWane Ductile offers black Sure Stop Gaskets in SBR, Neoprene, EPDM, and Nitrile, either made in the USA or imported. McWane Ductile also offers a blue SSG, only available as SBR and import only.
SUMMARY
Various methods are available for restraining Ductile iron pipe joints depending on the type of installation, the pressure the line will operate under, and the size (diameter) of the Ductile iron pipe being used. After reading this blog, we hope you have a better understanding of how McWane Ductile’s easy-to-install Sure Stop Gasket may be the best watertight solution for your boltless restrained joint project.
Need Assistance with Your Waterworks Project?
If you have any questions regarding your water or wastewater infrastructure project, be sure to reach out to your local McWane Ductile representative. We have team members who've managed small and large water utility systems, served in engineering consulting firms, and bring decades of experience in solving field issues involving pipeline construction and operation. From design to submittal, to installation, we strive to provide education and assistance to water professionals throughout the water and wastewater industry.


