In my previous experience, I've spent many hours operating numerous types of saws in various settings, such as felling a tree during seasonal work in my college years or emergency tree removal work in the aftermath of destructive storms while serving on a right-of-way crew. Whether you're trimming a tree or cutting a piece of Ductile iron pipe (DI pipe), they share similarities, such as analyzing the situation, safety first, measuring twice, and cutting once.
Pipe installations may require field cutting, particularly when fittings are used. Whether you're an underground contractor or a municipal waterworks employee, knowing the proper and safest way to cut DI pipe to length in the field is not just about safety; it's also about efficiency. This knowledge can save time and money on projects while avoiding potential hazards during the cutting process.
In this #IronStrong Blog, we will revisit a popular topic and discuss, in-depth, the correct way to measure and cut DI pipe using a rotary-type abrasive wheel saw, one of the most popular tools for this procedure. If you are required to cut a portion of the pipeline, the following steps are recommended.
SIX STEPS FOR CUTTING DUCTILE IRON PIPE SAFELY
STEP 1: GATHER THE RIGHT TOOLS
McWane Ductile recommends the following:
- Personal Protective Equipment (PPE) designated by your employer
- Outside Diameter (OD) tape measure
- Chalk, Crayon, or Paint Pen
- K-12-style gas-powered saw with an abrasive cutting wheel or diamond-tip blade with a protective guard. These are common saw styles used throughout the waterworks industry. Chain saws specifically designed to cut Ductile iron and pneumatic saws are also options for field cutting.
- IMPORTANT NOTE: Hydraulic squeeze cutters are not suitable for cutting DI pipe.
- Angle grinder (corded or battery-powered)
- A fire extinguisher, especially in drought-prone areas with windy weather conditions and dry, flammable vegetation.
STEP 2: SELECT AND MEASURE THE PIPE
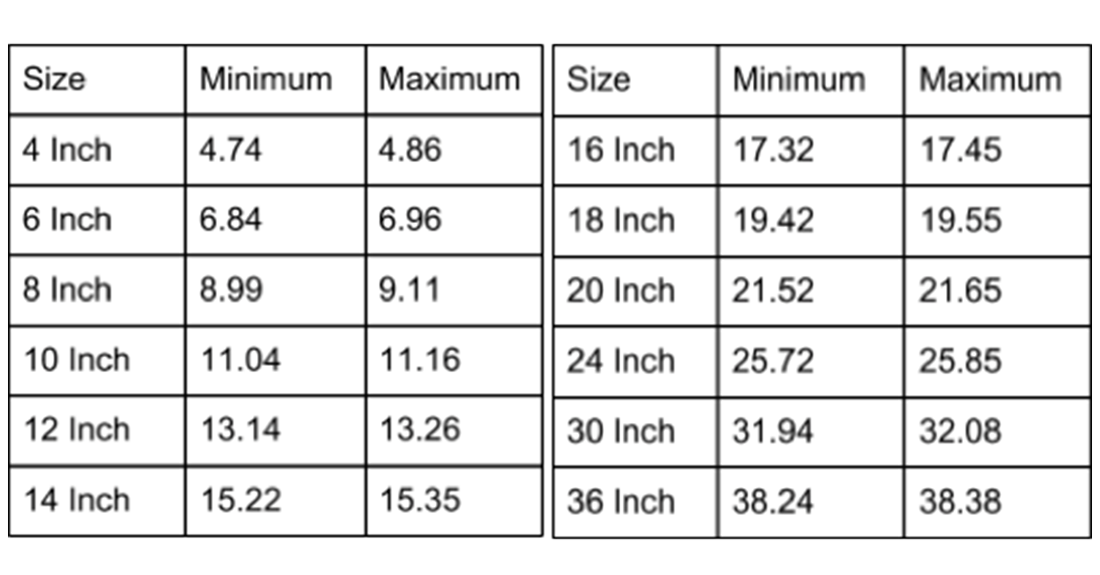
Before cutting any pipe, select and measure it. Though pipes at McWane Ductile’s foundries are regularly checked during the quality control process, an OD (Outside Diameter) field measurement is recommended to ensure the pipe diameter and circumference are within tolerance (see the chart below) and to identify the exact location along the pipe for cutting. Selecting a pipe with an OD toward the minimum range may ease installation. Need a refresher on how to use an OD tape? See the link for an instructional blog and video: How to Use an OD Tape on Ductile Iron Pipe.
As a helpful visual indicator, McWane Ductile identifies large-diameter pipes with colored markings in three ways.
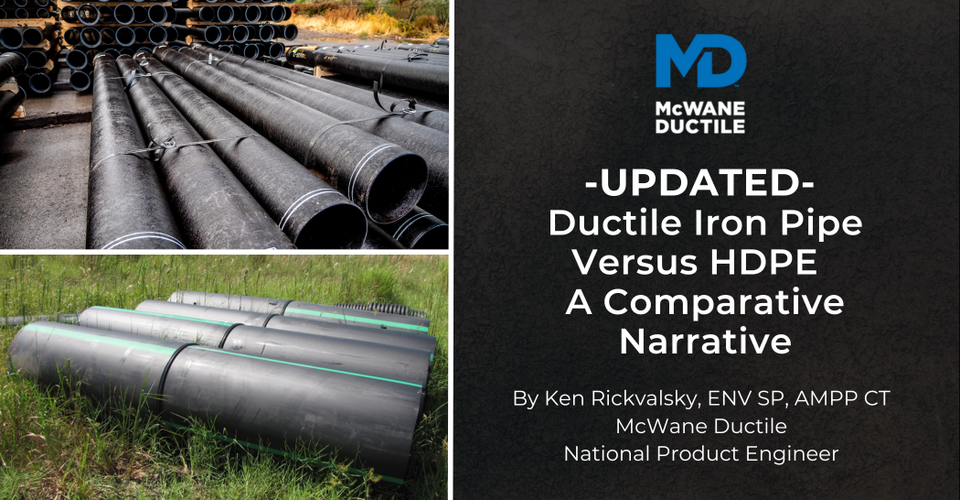
- Two green stripes on the bell face signify Gauged Full Length (GFL).
- Taped Full Length (TFL) is written on the bell face, indicating the pipe OD is within tolerances with potential ovality compared to a GFL pipe.
- If no stripes or letters are written on the bell face, this indicates Regular Stock, whereas a barrel section may be slightly above or below the tolerances.
- IMPORTANT NOTE: These markings have been provided to enhance pipe selection but do not indicate that field rounding of the pipe will be required. Instructional blogs and videos for internal and external pipe rounding techniques can be found here:
PRO TIP: Separating pipes to be cut at the beginning of a project into separate locations will save time throughout your installation project.
STEP 3: MEASURE TWICE TO CONFIRM TOLERANCES
Secure a safe, level surface, such as wood timbers or blocks, to hold the pipe in place. Using an OD (Outside Diameter) tape and the DI pipe outside diameter chart (see below), measure around the pipe's OD in the location to be cut. Verify that the pipe's OD is within the minimum and maximum tolerances and that the joint will compress and seal correctly.
McWane Ductile recommends cutting at least 2 feet from the bell face due to the taper of the bell end. Again, this depends on the OD measurement. If the OD measurement is within tolerance, cut it. The twelve-inch pipe below is not marked and is thus considered suitable for cutting. Large diameter pipes, 14 inches and above, are marked as previously discussed.
FOR EXAMPLE: In the How to Cut Ductile Iron Pipe to Length Video, a 16-inch pipe is being cut and is first checked to see if it is within 17.32-inch to 17.45-inch. If the pipe had been smaller or larger than this range, we would have needed to find another pipe to cut.
PRO TIP: In the field, a Mechanical Joint (MJ) gland inserted over the pipe barrel can serve as a quick gauging device to determine field cutting.
STEP 4: MARK A STRAIGHT LINE AROUND THE PIPE AS A GUIDE
After determining where the cut will need to be made on the joint, mark where to cut. McWane Ductile’s foundry prefers using paint sticks to mark the DI pipe. Do not simply “eyeball it.” Using the straight edge of your OD tape and the crayon or marker, draw a straight line or a series of dash marks around the entire circumference of the pipe.
Field cuts for restrained joint pipe should be smooth, clean, and as square as possible to the pipe's axis because the cut end will be used as a reference to position the retainer ring.
REMINDER: McWane Ductile inspects the bell and spigot end of every joint of DI pipe we manufacture during the quality control process. Although the bell and spigot may be within tolerance, the outside diameter may vary slightly along the length of the pipe. Therefore, McWane Ductile and the American Water Works Association (AWWA) recommend measuring and using an OD tape to confirm measurements before cutting the pipe.
STEP 5: USE THE PROPER TOOL TO CUT THE PIPE
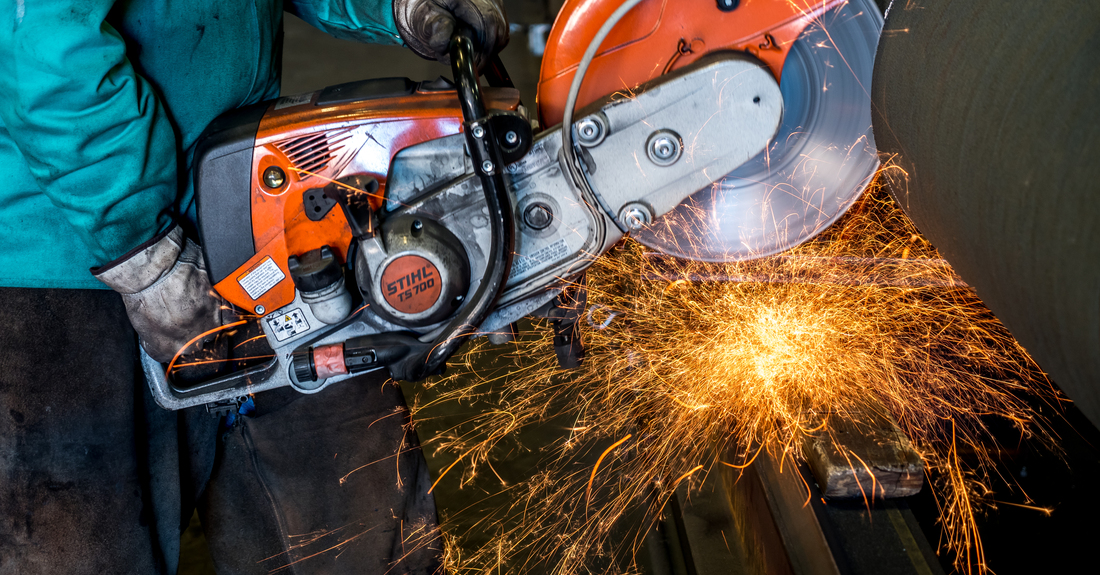
After drawing a straight line around the circumference of the pipe, use a K-12 saw or other suitable tool to make your cut along the marked line. Ensure all nearby coworkers or those assisting with this procedure stay clear of any flying debris or sparks.
SAFETY TIP: The PPE worn by the saw operator in our video is welding gloves, steel toe boots with metatarsal protection, safety glasses, ear plugs, and a hard hat with a face shield. Your company may have different requirements, so be sure to check with your supervisor or safety representative for PPE requirements and read the saw user manual.
PRO TIP: Cutting Ductile iron pipe with a K12-style saw will add to your overall installation time. You should factor in about one minute for each inch of pipe with the most commonly used thicknesses. For example, cutting a 16-inch pipe will take roughly 16 minutes.
STEP 6: USE AN ANGLE GRINDER TO SMOOTH & BEVEL THE CUT EDGE
If you are working with a Tyton® Joint, the edge of the pipe should be beveled using an angle grinder to a 30-degree taper before installing it. Round the leading edge of the spigot end and remove any sharp, rough edges or burrs that might cut, snag, dislodge, or roll the gasket. For tips and techniques for beveling Ductile iron pipe, see our blog and video, Chamfer or Beveling DI Pipe – What’s the Difference?
If it is a mechanical joint (MJ) is being used, no beveling is needed. Removing any rough edges around the cut area is good practice, but in most cases, the MJ pipe will be ready to install as soon as it’s cut.
PRO TIP: Generous bevels are advantageous in assembling field-cut pipe joints. To confirm the proper assembly of a field-cut pipe junction and uniform gasket positioning, use a thin, flat “feeler gauge” or extended paperclip to probe around the assembled joint. For more instructions on using a feeler gauge, see our helpful blog and video, How to Quickly Check for Proper Gasket Installation in Ductile Iron Pipe.
CAUTION: Some contractors prefer to use a K12-style saw to cut the pipe and bevel it. McWane Ductile does not support this action as it may create a safety hazard by causing undue stress on the cutting blade.
NOW, YOU KNOW THE PROCEDURE TO CUT DI PIPE SAFELY
Field cutting of Ductile iron pipe to length safely and effectively is a very important and necessary measure in almost all Ductile iron pipe installations. We have thoroughly broken down several tips, techniques, and recommendations that are essential to accomplishing this task in the most efficient and safest ways possible. As with tree trimming in my former right-of-way career, it's always best to assess the situation, measure twice, take your time, and cut once while letting the saw do the work. Be sure to download the handy tip sheet below and share it with your pipe installation crews. I hope you found this revisited topic helpful.
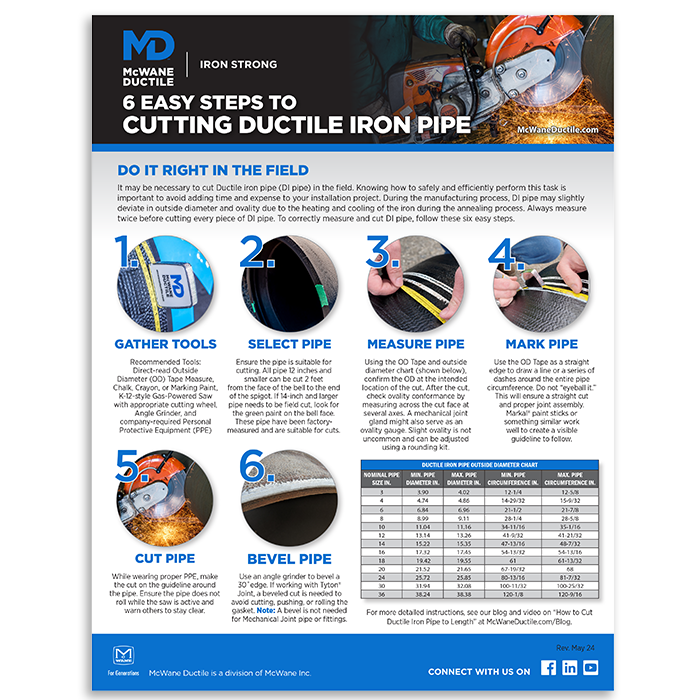
Need to cut Ductile iron pipe to length in the field? Use this free and handy tip sheet to properly measure and safely and efficiently cut DI pipe.
NEED ASSISTANCE WITH YOUR WATERWORKS PROJECT?
If you have any questions regarding your water or wastewater infrastructure project, your local McWane Ductile representative is equipped with the expertise to assist you. Many of our team members have managed small and large water utility systems, served in engineering consulting firms, and bring decades of experience solving field issues involving pipeline construction and operation. From design to submittal to installation, we strive to educate and assist water professionals throughout the water and wastewater industry.
